

Performance Exhaust
My system is aluminized steel, and begins with a 3″ mandrel bent down pipe. It immediately steps up to 3.5″ and remains 3.5″ through the tailpipe. The catalyst (soot trap) if equipped, can be retained. I can stay at 3″ into the catalyst, OR you can open up the inlet/outlet to 3.5″ and weld to my pipes retaining full functionality. Options for the catalyst are covered in the pdf schematic. The 92 and 93 trucks did not have a catalyst. Since this kit is universal, it comes with enough pipe to accommodate these trucks also. I use stainless steel band clamps at key joints, as they seal perfectly, and do not distort the pipes. Crossover pipes are also available as a $200 option in ceramic coated. This coating not only is attractive, and prevents rust, but it also contains the heat in the pipe saving the heat energy to drive the turbo more efficiently.
This is a VERY sweet sounding system. The muffler is a straight through design with internal louvers, and provides awesome performance with an aggressive, but not obnoxious tone. I use the same pipes on my own ’96. I can do 4″ if required, but feel it unnecessary given the level of performance achieved already with my truck.
My truck (with other modifications of course) puts out 237 HP at the rear wheels! This is with the STOCK computer programming. I have been improving my trucks performance steadily, and expect much higher numbers soon!
6.5 Exhaust Install Schematic (pdf)
Downpipe
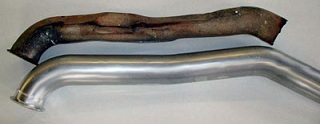
The first order of business is to replace the crinkled stock downpipe with this nice mandrel bent 3″ pipe.
![]()
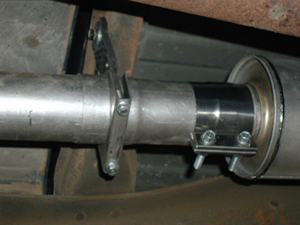
The next pipe is a 3.5″ pipe swaged down to 3″ ID. This provides a nice small step transition to promote good flow while maintaining some velocity.
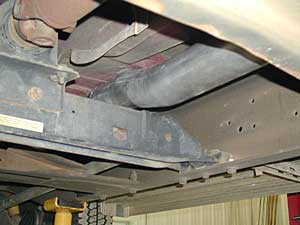
Crossmember offset pipe
The crossmember offset pipe (longest in the system) then moves the routing downward and slightly inward to keep from rubbing any heat shields etc.
HD Rubber hanger
I use a HD Rubber hanger (where possible) to hold the system firmly in place. My preference is to bolt it to a crossmember at the front of the bed.
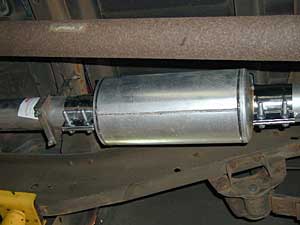
Muffler
The muffler is a relatively small bodied straight through design with a very minimal amount of louvering internally. This yields a throaty pleasing exhaust note that is much tamer than a simple straight pipe, yet performs just as well.
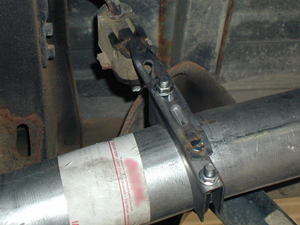
Tailpipe hanger front
The slotted rod pushes into the factory rubber hanger. The exhaust clamp can then be bolted to it. This type of system allows for a lot of flexibility during installation.
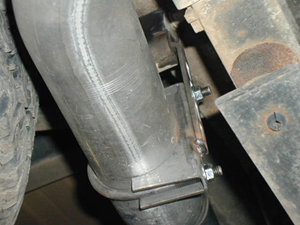

Tailpipe hanger rear
Like the front hanger, this one also clamps to the tailpipe, but also clamps the rear joint on the 2 pc tailpipe. I find it helpful to align the weld seam of the two sections and either peen with a hammer or tack weld together to make handling easier.
Tailpipe
The tailpipe exits just like the stock pipe. I have included enough material to clear the body line. Any excess may be trimmed if so desired. I have found this exit style to be the best at keeping the soot off of the vehicle body. I do not like turndowns as they can get the smoke caught in the airstream that swirls at the rear of the vehicle and trailer side.
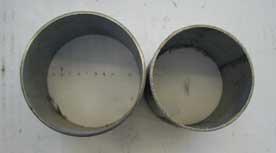
3″ to 3.5″ pipe comparison
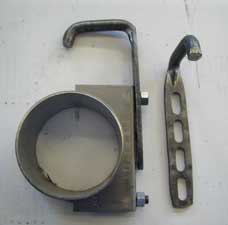
Hanger clamp
Muffler orientation
The muffler is installed with the openings of the louvers facing rearward so the exhaust goes “with the grain.” Reversing this orientation will do little to alter performance or sound levels.