

TECH TIPS
1996 and earlier Air Box Modifications
Snorkels
If you have one of these in your fender remove it. These are generally installed in ’95 and earlier trucks.
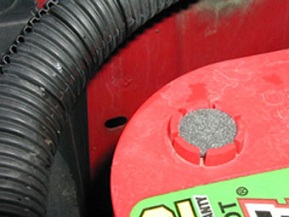
Snorkel Screw
This is where the front attachment screw is located. The battery sometimes must be removed in order to extract the screw.
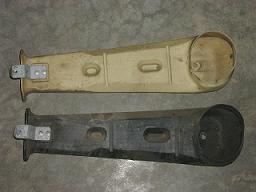
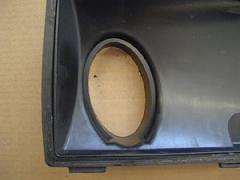
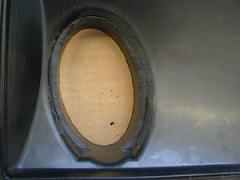
Air Box Inlet Pictures
This is the entry to the airbox. It attaches the box to the inner fender area. If yours has a cone inside like the one on the left, remove it, and enlarge the opening to a large oval like the one on the right.
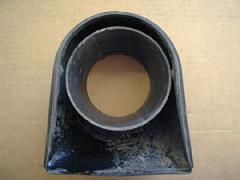
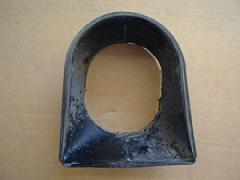
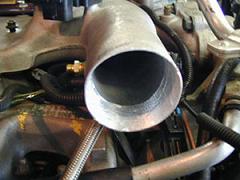
Air Box Cover Pictures
This is where the filtered air leaves the box and enters the hose connected to the turbo. The picture on the left is before, and the right is after. What we are doing here is trying to radius the sharp edges just like a multi-angle valve job for better, smoother air flow. BE CAREFUL not to remove too much material as there is very little thickness, and there is no fillet material on the outside. If you see light, use a suitable epoxy to build up on outside.
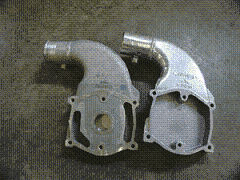
6.5 Intake Inlet
Finally, the aluminum intake manifold extension housing has quite a thick wall, and could stand to be relieved on the ID. You can bring this out to nearly a point. Blend back in as far as possible for maximum effect. A smoother finish will yield better airflow.
The LD intake extension casting (used on ’94+ trucks with “S” vin code as 8th digit) has a severely restricted airflow area due to the excess webbing left in the casting. This webbing (rough cast material) can be removed so that all that remains is the machined flat center ring which is necessary to seal the EGR passages. The alternative would be to swap both the upper and lower intake castings with those from a HD “F” engine. Owners of 1998 and later “S” engines with MAF sensor and EGR should be aware that the computer does not like the removal/disconnecting of the EGR system, and requires a “brain transplant” to a HD program.
Note: Brass fitting is where my boost gauge pressure tap is located.
Uni-filter element
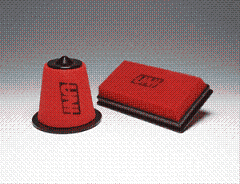
Finally, we top it all of with the Uni-filter element. I prefer this filter over the cotton gauze type (K&N/AFE etc) as they tend to sacrifice filtration to gain airflow which the Uni-filter does not. I also suggest that when servicing the filter in this box, you remove the ENTIRE BOX from the truck. Then clean the box and install the filter and cover prior to reinstalling the box. This ensures that the filter is properly seated, and will not bow in and fall out of place allowing unfiltered air to pass.
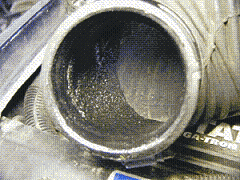
Seeing is believing!
The gunk that gets past the filter tends to wind up in the oil deposited by the crankcase breather tube. This particular one is so horrifying that it must have been run with a filter that had fallen out of place, or been incorrectly installed. The cotton/gauze type filters also deposit a lot of grit here as the oil “tacks” it like fly paper. The Uni-filter element has, in my experience has resulted in much less grit deposition in this area and reduced silicon levels as found by oil analysis. This would be indicative of greatly improved filtration.
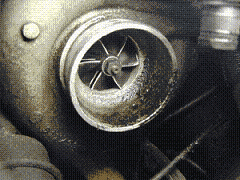
This same gunk will next encounter the turbo compressor blades and eventually erode them to a point of being ineffective! Of course, the valves/seats, pistons/rings, and engine oil will be the next in line to receive this dirt…
EGR Mystery Gasket
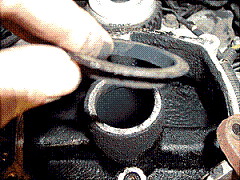
This picture shows what I refer to as the EGR mystery gasket. The mystery comes into play because it is often omitted during service, and the parts diagrams/lists are quite vague and often do not include this piece. It is often overlooked, and should be suspect when troubleshooting EGR smoke related problems.
For more information E-mail: john@kennedydiesel.com